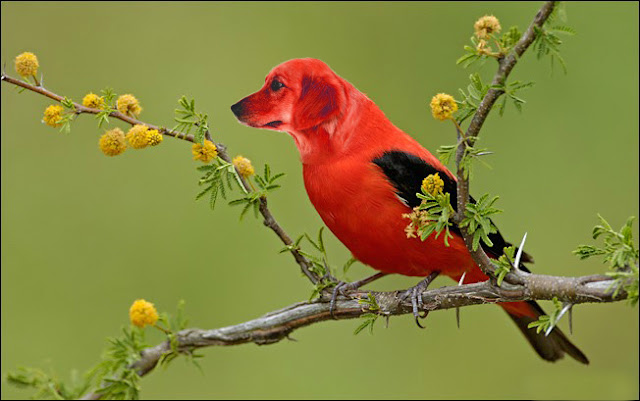
Hello people.In this tutorial I will tell you how to morph two images and make them into one using photoshop.
Step 1 : First we need two images to morph, for this tutorial I selected two images.
1) Bird [ Download ]
2) Dog [ Download ]
Step 2 :
Now we will start off chopping the dog's head.Here i am using lasso tool to crop the dog's head.
Now after you create the selection you have to right click inside the path and select make selection, then copy and paste it on the bird image.
Now after you create the selection you have to right click inside the path and select make selection, then copy and paste it on the bird image.
Step 3 :
After pasting on the bird layer you will have to right click on the dog's head layer on the layers palette and convert it to smart object. Then hit CTRL+T and match it to the bird's head.
This is how we convert the elephant head to smart object, it greatly helps in maintaining the quality after cropping.
Step 4 :
Now that we have transformed the dog’s head on top of our bird we will create a new adjustment layer and control the hue and saturation for the dog’s head to match it to the bird. So yeah hold alt and click the “create new fill and adjustment layer” select the hue and saturation and enter the settings shown below.
Step 5 :
Create a new layer and name it skin, in this layer we are going to make the scales of the bird on the dog’s head. For doing this we will quickly grab the clone stamp tool and select sample all layers and then hold alt on the bird’s scales and using a soft brush put it on the elephants head. Make sure you are on the skin layer which you created now!
Here is the final result.


0 comments:
Post a Comment