Wednesday, 31 October 2012

Microsoft Windows 8 Professional x86-x64 Final Untouched Activator Download


Windows 8 is the codename for the upcoming new operating system of MicrosoftWindows that follows Windows 7. It features a new Metro-style interface that was designed for touchscreen, mouse, keyboard, and pen input. It also adds support for the ARM processor architecture in addition to the previously supported x86 microprocessors from Intel and AMD. Its server counterpart is codenamed WindowsServer 8. The Windows 8 is designed to be the first Windows client to support systems on a chip (SoC) architectures, including ARM, and since it will be pre-installed on a range of next generation devices, it will also feature Metro, a NUI + GUI interface on the surface combined with a new application platform under-the-hood designed to enable the creation of immersive experiences


Requirements:

Processor: 1 gigahertz (GHz) or faster
RAM: 1 gigabyte (GB) (32-bit) or 2 GB (64-bit
Hard disk space: 16 GB (32-bit) or 20 GB (64-bit
Graphics card: Microsoft DirectX 9 graphics device or higher
To use touch, you need a tablet or monitor that supports multitouch
To snap apps, you need a screen resolution of at least 1366 x 768


Thursday, 25 October 2012

Add Animated Rainbow Changing Colors To The Links On Blogger

Hello friends! Effect of rainbow colors will give random colours to your links on hover. This widget working is based on simple JavaScript. Once applied, all the links on the page displays a rainbow effect on mouse hover and we have a one click button to add it to your blog in seconds


Check out the Demo
Add Rainbow Links To Your Blog

Simply click the button below, select the blog you want it on then click add widget :


That's it a cool effect for your links, check out more of our Blogger Gadgets.

Tuesday, 23 October 2012

7 Types of Animated Flying Objects Like Flying Twitter Bird For Blogger


How To Install This Widget To Blogger ?

  1. Replace My Twitter Username With Yours.
  2. Replace Tweet This Text With Your Text.
  3. Choose a type of Bird.
  4. Click On "Generate" Button.
  5. Finally Click On Add to Blogger Button.


Monday, 22 October 2012

HOW TO:Post To All Of Your Facebook Groups In One Click

I think this post is very useful for facebook users to share anything to all facebook groups just in one click.Now you can do 100 or most work one time. Go to your website and choose your selected post. After go to your facebook site.

NOW DO THIS ONE 

Go to this site


After


OR USE THIS SITES 


GO Power Master apk Free Download

Go Power Master


Description


GO Power Master is a professional tool to help you save the power of the battery.

New features:
1. Decreased the power consumption
2. Eliminated the annoying pop-up window
3. Crashing when open the consumption detail interface

GO Power Master is a professional management tool represented by GO Dev team to help you monitor and save the power of your battery.
Characteristics:
1. Functional module management:
GO Power Master will decrease the power loss by managing the network, the radio, the brightness and other power consumed modules of your mobile phone
2. Running applications monitoring:
GO Power Master will help you to find out the most power consumed applications by precisely monitoring and analyzing the power consuming of every running application.
3. Smart power saving:
GO Power Master will smartly switch to the saving mode when the power is low or the time you set is reached.
4. Time statistics
GO Power Master will precisely calculate the time statistics for endurance, calls, video, audio, network and standby of your battery.
5. One-Touch Optimization helps you to lighten the load of your battery easily.
6. Modes help you to use the battery selectively and wisely.
7. The GO Power Master widgets provide you the way to handle the power quickly without opening the application.
8. More widgets, more functionalities with GO Launcher EX.
How to add the GO Power Master widgets?
-Long press the home screen, select “Widget” and select “GO Power Master (4*1)”. Make sure there’re enough spaces in your home screen.
-If you have already installed GOLauncher EX, you can use the cool GO Power Master GOWidgets with more functions and more effects.


Saturday, 20 October 2012

Most Popular 106 Android Apps

Most Popular 106 Android apps


  1. 360.Panorama.v1.0.16-AnDrOiD
  2. 360.Panorama.v1.0.17-AnDrOiD
  3. A.I.type.Keyboard.Plus.v1.9.7.2-AnDrOiD
  4. Advanced Clock Widget Pro v0.720-AnDrOiD
  5. Alarm.Clock.Xtreme.v3.3.8p-AnDrOiD
  6. All.My.Movies.v2.4.5-AnDrOiD
  7. Anatomy.3D.Pro.-.Anatronica.v1.47-AnDrOiD
  8. Android.Tuner.v0.1.6-AnDrOiD
  9. Audio.Control.v1.8.1-AnDrOiD
  10. Audio.Control.v1.9-AnDrOiD
  11. Battery.and.Cpu.manager.v1.0-ROOTED.DEVICES.ONLY-AnDrOiD
  12. Battery.HD.Pro.v1.19-AnDrOiD
  13. BSPlayer.v1.5.136-AnDrOiD
  14. BusyBox.Pro.v9.6.4-ROOTED.DEVICES.ONLY-AnDrOiD
  15. C4droid.(C-Cplusplus.compiler).v3.61-AnDrOiD
  16. Call.Recorder.Galaxy.S2.and.S3.FULL.v1.9.25-AnDrOiD
  17. Camera FV-5 v1.28
  18. Camera.FV-5.v1.29-AnDrOiD
  19. Camera360.Ultimate.v3.8.build.198.(Google.Play)-AnDrOiD
  20. ChompSMS.Donate.v5.53-AnDrOiD
  21. Clean.Gloss.Go.Launcher.Theme.v1.2-AnDrOiD
  22. Conjure.v1.1.0-AnDrOiD
  23. CPU.Control.v2.0.0-AnDrOiD
  24. Cut.the.Rope.Experiments.HD.v1.1.6-Game-AnDrOiD
  25. Cut.the.Rope.Experiments.v1.1.6-Game-AnDrOiD
  26. DicePlayer.v2.0.16-AnDrOiD
  27. doubleTwist.Alarm.Clock.v1.3.5-AnDrOiD
  28. Dropsync.v2.3.4.with.Dropsync.PRO.Key.v2.3.4-AnDrOiD
  29. Drum.Kit.v65-AnDrOiD
  30. EasyProfiles.(Pro).v4.7.11a-ROOTED.DEVICES.ONLY-AnDrOiD
  31. Endomondo.Sports.Tracker.PRO.v8.2.1-AnDrOiD
  32. EveryCircuit.Full.v1.15-AnDrOiD
  33. Extreme.Biking.3D.v1.0-Game-AnDrOiD
  34. EyeEm.-.Photo.Filter.Camera.v3.1.6-AnDrOiD
  35. File.Expert.Pro.v5.0.1-AnDrOiD
  36. FlashLight.HD.LED.Pro.v1.41-AnDrOiD
  37. FolderSync.v2.2.1-AnDrOiD
  38. FPse.for.android.v0.11.49-ROOTED.DEVICES.ONLY-AnDrOiD
  39. F-Sim.Space.Shuttle.v2.0.111-Game-AnDrOiD
  40. Future.Mayhem.v1.1-Game-AnDrOiD
  41. FxCamera.v2.3.3-AnDrOiD
  42. GA.1.An.Assassin.in.Orlandes.v1.2.7.0-Game-AnDrOiD
  43. GOWidget.Theme.-.Transparency.v3.49-AnDrOiD
  44. GPS.Tracking.Pro.v5.2-AnDrOiD
  45. gReader.Pro.(Google.Reader).v3.0.1-AnDrOiD
  46. GreenPower.premium.v8.6.1-AnDrOiD
  47. GrooVe.IP.v1.2.27-AnDrOiD
  48. Handrite.Note.Pro.v1.79-AnDrOiD
  49. HD Metallic Widgets v1.0
  50. HD.Widgets.v3.2.2-AnDrOiD
  51. Heritage v1.01
  52. Hey.Zombie.v1.0.01-Game-AnDrOiD
  53. Hold.Screen.ON.Face.detection.v1.47-AnDrOiD
  54. Infectonator.v1.0.6-Game-AnDrOiD
  55. iTriage.Health.v4.50-AnDrOiD
  56. LINE.camera.v2.4.3-AnDrOiD
  57. Magnetic.Balls.Live.Wallpaper.v2.12-AnDrOiD
  58. Manga.Watcher.v0.6.5-AnDrOiD
  59. Manga.Watcher.v0.6.6-AnDrOiD
  60. Memedroid.Pro.v2.4.2-AnDrOiD
  61. Mineforge.-.Pocket.Edition.v1.4-Game-AnDrOiD
  62. Mobile.Counter.Pro.-.3G.WIFI.v2.5.3-AnDrOiD
  63. Mobile.ODIN.Pro.v3.35-ROOTED.DEVICES.ONLY-AnDrOiD
  64. Moonplus.Reader.Pro.v1.8.3.build.183001-AnDrOiD
  65. MXHome.Launcher.3.0.v3.0.5-AnDrOiD
  66. My.Budget.Book.v3.0-AnDrOiD
  67. MyAntiVirus.Pro.-.AntiVirus.v1.9.0-AnDrOiD
  68. MyCalendar.Mobile.v2.53-AnDrOiD
  69. Navier.HUD.Navigation.Premium.v1.4.5-AnDrOiD
  70. Navier.HUD.Navigation.Premium.v1.4.6-AnDrOiD
  71. Neutron.Music.Player.v1.63.0-ROOTED.DEVICES.ONLY-AnDrOiD
  72. NotifierPro.Plus.v6.0-AnDrOiD
  73. Open Sea! (Go Down Mo!) v2.0
  74. Paper.Camera.v3.3.2-AnDrOiD
  75. Paperland.Pro.Live.Wallpaper.v1.4.1-AnDrOiD
  76. Photo.Editor.v2.0.0-AnDrOiD
  77. Photo.FX.Live.Wallpaper.Unlocked.v3.2.2-AnDrOiD
  78. Pool Break Pro v2.1.4
  79. Pool.Break.Pro.v2.1.4-Game-AnDrOiD
  80. Raven.on.graveyard.live.wallpaper.v1.0-AnDrOiD
  81. Real.Colors.Pro.v1.1.1-AnDrOiD
  82. ROM.Toolbox.Pro.v5.3.9-ROOTED.DEVICES.ONLY-AnDrOiD
  83. Shazam.Encore.v3.11.1-BB76415-AnDrOiD
  84. SilentCamera.NINJA.v1.6.6-AnDrOiD
  85. SketchBook.Pro.v2.2.2-AnDrOiD
  86. Sleep.as.Android.FULL.v20121009-AnDrOiD
  87. Smoke.A.Bowl.v3.2.0-AnDrOiD
  88. SMS.Backup.And.Restore.Pro.v5.92-AnDrOiD
  89. Snappy.Dragons.2.Premium.v1.0-Game-AnDrOiD
  90. Solo v1.53
  91. Sonos.Widget.Pro.v2.2-AnDrOiD
  92. ssLauncher.the.Original.v1.8.1-AnDrOiD
  93. StarCaptain.v1.11-Game-AnDrOiD
  94. Sygic GPS Navigation 11.0.1 for Android
  95. The Avengers Live Wallpaper Full v1.9
  96. The.Bards.Tale.v1.1.1-Game-AnDrOiD
  97. TomTom.D-A-CH.v1.0-AnDrOiD
  98. TomTom.Poland.v1.0-AnDrOiD
  99. TrustGo.Antivirus.v1.2.5-AnDrOiD
  100. TV.Show.Favs.Premium.v3.0.717-AnDrOiD
  101. Ultimate.Guitar.Tabs.v1.7.3.with.Tab.Pro.and.Guitar.Tools-AnDrOiD
  102. Weather Services PRO v1.7.6
  103. Weather.Eye.Pro.v3.0-AnDrOiD
  104. White.and.Pastel.go.launcher.theme.v1.1-AnDrOiD
  105. Wifi.And.USB.Hotspot.v1.0-AnDrOiD
  106. Zion.Tower.Defense.v1.1.7-Game-AnDrOiD


Friday, 19 October 2012

Animated Sassy Social Bookmark Gadget For Blogger


This is a very cool social bookmarking gadget with animated effect.With the Sassy bookmarks gadget a basic share button is placed in the corner of your blog and then on hover 6 icons for main social bookmarking websites like 
Pinterest, Google+, Facebook, Twitter, Tumblr and Email appear in a semicircle.


Add The Animated Sassy Bookmarking Gadget To Your Blog

Remember Always Back Up Your Template Before You Make Changes - How To Back Up A Blogger Template


Step 1. In Your Blogger Dashboard Click The Drop Down Menu For Your Blog > Choose Template > Then Edit Html > Tick The Expand Widget Templates Box.


Step 2. Find the following piece of code in your blogs Html : (Click Ctrl and F for a search bar to help find the code.

</body>

Step 3. Copy and Paste the following code Directly Above / Before </body>


<!-- Start Shareaholic Sassy Bookmarks HTML - http://technoclouds.blogspot.in -->
<div class='shr_ss shr_publisher'>


</div>
<!-- End Shareaholic Sassy Bookmarks HTML -->
<!-- Start Shareaholic Sassy Bookmarks settings -->
<script type='text/javascript'>
var SHRSS_Settings = {&quot;shr_ss&quot;:{&quot;src&quot;:&quot;//dtym7iokkjlif.cloudfront.net/media/downloads/sassybookmark&quot;,&quot;link&quot;:&quot;&quot;,&quot;service&quot;:&quot;5,7,2,313,38,201,88,74&quot;,&quot;apikey&quot;:&quot;b87f5899d80a5edce8b5e55f58542ef0f&quot;,&quot;localize&quot;:true,&quot;shortener&quot;:&quot;bitly&quot;,&quot;shortener_key&quot;:&quot;&quot;,&quot;designer_toolTips&quot;:true,&quot;tip_bg_color&quot;:&quot;black&quot;,&quot;tip_text_color&quot;:&quot;white&quot;,&quot;viewport&quot;:true,&quot;twitter_template&quot;:&quot;${title} - ${short_link} via @Shareaholic&quot;}};
</script>
<!-- End Shareaholic Sassy Bookmarks settings -->
<!-- Start Shareaholic Sassy Bookmarks script -->
<script type='text/javascript'>
(function() {
var sb = document.createElement(&quot;script&quot;); sb.type = &quot;text/javascript&quot;;sb.async = true;
sb.src = (&quot;https:&quot; == document.location.protocol ? &quot;https://dtym7iokkjlif.cloudfront.net&quot; : &quot;http://cdn.shareaholic.com&quot;) + &quot;/media/js/jquery.shareaholic-publishers-ss.min.js&quot;;
var s = document.getElementsByTagName(&quot;script&quot;)[0]; s.parentNode.insertBefore(sb, s);
})();
</script><small><a href='http://technoclouds.blogspot.in/2012/10/animated-sassy-social-bookmark-gadget.html'>Animated Social Gadget</a> - <a href='http://technoclouds.blogspot.in'>Blogger Tips</a></small>


<!-- End Shareaholic Sassy Bookmarks script -->
<!-- End Shareaholic Sassy Bookmarks HTML - 
http://technoclouds.blogspot.in-->

Step 4. Save Your Template.


That's it the animated Sassy Bookmarks gadget is on your blog ! Make sure to check out more of our Social Bookmarks Gadgets.

Thursday, 18 October 2012

Add An Awesome Fixed Position Slide Open Egg Bookmarking Gadget To Blogger

A few weeks ago I have posted how to Add An Awesome Fixed Position Slide Open Heart Bookmarking Gadget To Blogger.In this post we have same social bookmarking gadget but with oval egg shape instead of heart.On hovering mouse over the egg,the egg slides to open bookmarking buttons which allows your readers to share posts on Facebook, Twitter, Google +, Blogger, LinkedIn, Stumble Upon, Email and the Share This Icon Offers hundreds more bookmarking choices.Below is a screenshot how it looks.

Add The Share This Egg To Your Blog

Remember Always Back Up Your Template Before You Make Changes

Step 1. In The New Blogger Dashboard Click The Drop Down Menu For Your blog And Choose > Template > Under your blog's live demo choose "Edit Html" .

Step 2. Find the following piece of code in your blogs Html : (Click Ctrl and F for a search bar to help find the code

</head>

Step 3. Copy and Paste the following code Directly Above / Before </head>


<!-- Start EGG Bookmarking Gadget Code From http://technoclouds.blogspot.in/ --><script src='http://w.sharethis.com/gallery/shareegg/shareegg.js' type='text/javascript'/><script src='http://w.sharethis.com/button/buttons.js' type='text/javascript'/><script type='text/javascript'>stLight.options({publisher: &quot;bea50586-2b9f-448d-947a-01385f28e305&quot;, onhover:false}); </script><link href='http://w.sharethis.com/gallery/shareegg/shareegg.css' media='screen' rel='stylesheet' type='text/css'/><!-- End EGG Bookmarking Gadget Code From http://technoclouds.blogspot.in/ -->


Step 4. Find the following piece of code in your blogs Html : (Click Ctrl and F for a search bar to help find the code

</body>

Step 5. Now Copy And Paste This Code Directly Above / Before </body>


<!-- Start EGG Share Code From http://technoclouds.blogspot.in/ --><div style='position: fixed; bottom: 2%; left: 2%;'><div class='shareEgg' id='shareThisShareEgg'/></div><script type='text/javascript'>stlib.shareEgg.createEgg(&#39;shareThisShareEgg&#39;, [&#39;facebook&#39;,&#39;twitter&#39;,&#39;googleplus&#39;,&#39;linkedin&#39;,&#39;blogger&#39;,&#39;stumbleupon&#39;,&#39;sharethis&#39;], {title:&#39; <data:blog.pageTitle/>&#39;,url:&#39;<data:blog.url/>&#39;,theme:&#39;shareegg&#39;});</script><a href="http://technoclouds.blogspot.in/">Blogger Gadgets</a><!-- End EGG Share Code From http://technoclouds.blogspot.in/ -->

Important, Move The Position Of The Gadget :

The Gadget is currently set to be in the bottom right corner of your blog but you can easily change this.In yellow above you can see bottom: 2%; left: 2%;.You can change Bottom to top for it to be at the top of the page and left to right for it to be on the right of the page.You can also change the percentages to have it further from the bottom/top and left/right.

Step 6. Save Your Template.

That's it the gadget has been added to your blog.Make sure to check out more of our Blog Gadgets and Social Bookmarking Gadgets.


Windows 8 for Android Free Download


Make your phone run like a new computer with this amazing themed launcher!
Get ready for an entirely new experience on your phone! This launcher allows your phone to emulate a windows 8 pc on your Android device. You can replace this home application with the default one and access everything on your phone through Windows 8 for Android. You can add tiles with your favorite applications on the home screen as well as your most used apps like the browser, phone, mail, and messaging. There are also folders so that you can add your favorite games, social, and media apps.


Screen Shots


Tuesday, 16 October 2012

How to:Update Your Facebook status from different phones (Iphone,Blackberry) without any Application - Online


Update Your Facebook status
from different phones (Iphone,Blackberry) without any Application - Online


Facebook Android

Update Your Facebook status
via different phones.No need to use any app like Show Off.Just in the bellow section choose your phone and go with that.


Iphone 5 - Here

Iphone 4S- Here

Apple Ipad- Here

Blackberry- Here

NASA satellite- Here


Monday, 15 October 2012

NinJump apk Free Download


Description


NinJump has climbed onto Android!
"Yet another brilliant slice of freebie fun" -Pocket Gamer
"You really need to give Ninjump a try" -Touch Arcade
"Check out Ninjump, it's extremely fun" -148 Apps
"This is fast becoming one of my favorites" -The App Era

Rise to the top and become a ninja master in NINJUMP, the latest FREE game from Backflip Studios, makers of PAPER TOSS!

In this fast paced ninja climbing game, your goal is to rise as high as you can while avoiding killer squirrels, angry birds, enemy ninjas, throwing stars and exploding bombs. With a simple tap you can jump from one wall to the other, knocking obstacles from the air as you do. Take down three enemies of the same kind to trigger mega-jump bonuses. Collect shields to plow through your opponents with. Just watch out for ledges and other ninjas because they will knock you off and send you to your doom!

You will be amazed by the gorgeous graphics, rich gameplay, immersive music and the insanely addictive quality of this game.

Features include:
-Simple single-tap gameplay
-Ninjas
-Killer squirrels
-More ninjas
-Beautiful graphics
-Awesome bonuses
-Original sound and music
-Papaya Leaderboards
-Challenge a friend via email
-Post scores on Facebook or Twitter


Download

Sunday, 14 October 2012

Android 4.2 Key Lime Pie Leaked Gmail Free Download


Installation Option 1:

Uninstalled old apk with Titanium -> Reboot -> Installed new Gmail apk with explorer -> Reboot - Done.

Installation Option 2:


The Gmail 4.2 APK is signed by Google, but with a different key than the one in the Play Store (we checked the signatures - they differ). One is probably the test key and the other the production key. For this reason, you can't simply install it as an update and therefore need to be rooted with the ability to mount the /system directory for writing in order to remove the existing Gmail APK.


OK, let's get down to it. You'll probably need ADB installed on your computer (here's an easy way that doesn't require downloading the Android SDK). There is a chance that this might work without ADB by just removing the APKs mentioned below and installing the new one, but it didn't seem to work reliably for everyone. This should, though:

1. Download Gmail 4.2.

2. Rename it to Gmail2.apk.

3. Make a Nandroid backup in case something goes wrong (this is always a good thing to do before messing with your device).

4. Delete (or move if you want to save the APKs) all other versions of Gmail. Usually there are 2 or 3 copies. One will be in /system/app (that's the original Gmail that was pre-installed on the device) and there may be a few in /data/app (these are the updates installed from the Play Store). They'll be called "Gmail.apk," or "com.google.android.gm-[number].apk," An easy way to tell is to look for the Gmail icon.

5. You may need to delete the .odex files matching the APKs in step 4 too, if you have them. Neither I nor Artem had to do this, but there are many different ROMs out there, and we're trying to cover all bases. Ignore this step and only come back to it if something doesn't work later.

6. Reboot. Once you do, you should have no Gmail as far as Android is concerned.

7. You can try to install the Gmail 4.2 APK you downloaded at this point by tapping it in your favorite file explorer (move the APK to your device first, of course). If that doesn't work, or if you prefer ADB, fire up a command line and type adb install Gmail2.apk.

If you get an error message, you probably didn't delete all copies of Gmail. If you don't feel like playing with ADB for Step 7, I've also gotten it to work by just copying the APK to /data/app, but that's not as fool proof as "ADB install".


Friday, 12 October 2012

Run Android 4.0 Ice Cream Sandwich on Your PC


Android, at the moment at least, runs primarily on devices with ARM based CPUs. The ARM CPU is a special low-power, high performance chip designed to run in devices rather than in desktop computers. However, like Linux, it isn’t restricted to only running on ARM chips. It can also run on MIPS (another type of  device centric chip) and on Intel x86 chips that are found in PCs.

Although Android 4.0 Ice Cream Sandwich was released to the public last year, it has taken a few months to port the current source code to the Intel x86 platform. A few days ago the Android-x86 project announced the first release candidate. The software comes in the form of .iso files and can be used to boot a PC (or better still a netbook) from CD/DVD or to create a bootable USB drive.

The best way to test Android 4.0 for Intel is either boot up an Asus Eee PC netbook or to run it in a Virtual Machine (VM) using the open source VirtualBox software. Which ever method you choose the first step is to download the .iso from the Android-x86 site. Choose the appropriate .iso image, there are images for Asus,  MSI 110W and Lenovo, and download. The files are about 190MB and so should only take a few minutes on decent broadband. The best image file for VirtualBox is the Asus Eee PC image.

Laptop

If you don’t have an Asus laptop/netbook, you can try this on just about any laptop, however the level of hardware support (especially for the wireless adapter) will vary. The first step is to create a bootable USB disk using Unetbootin (or to burn the .iso file to a CD). Boot the laptop/netbook from the USB (you might need to go into the BIOS or press F8 or F12 during startup to select the boot device).

At the boot menu select “Live CD – Run Android-x86 without installation” and hit Enter. Android 4.0 will start to boot. Once booted you will be greeted by the ICS Welcome screen.

Use your mouse to click on “Start”. Complete the first-time configuration steps (you can just leave everything at its default. If you choose to sign in with your Google account, Android will first try to connect to your WiFi).  Once you click “Finish” you will be presented with the ICS home screen.

To navigate use the mouse like you would your finger. Tap is click, swipe is click, hold and move. Clicking the application menu (in the top right hand corner) will reveal the pre-installed applications. Swiping left (click, hold, move mouse left) shows the next page and so on. When using apps that need keyboard input you can use your PC’s keyboard, you don’t need to click every letter on a virtual keyboard!

Google Play (i.e. the Android Market) is available and a good selection of applications are present including essential apps like DropBox and Kindle. However some important apps like Skype are not available for Android running on Intel yet.

One disconcerting “feature” is that some apps run in portrait mode which means everything flips 90 degrees leaving you twisting your head and trying to work out that up and down are now left and right with the mouse! It is best to avoid these apps at all cost as trying to get the screen back to landscape seems impossible other than with a reboot.

VirtualBox

It is also possible to run ICS in a Virtual Machine using VirtualBox. Start VirtualBox, click the “Machine” menu and then “New…” Step through the Wizard, having entered a name (e.g Android 4), make sure your select Linux as the “Operating System” and “Other Linux” as the version. Set the memory to be 512MB and use the defaults for creating an 8GB hard drive.

Once the VM is created, click the “Machine” menu and then “Setting…” Click “Storage” in the left pane and then click the CD-ROM icon (marked as “Empty”) in the “Storage Tree.” In the “Attributes” panel click the little CD-ROM icon next to the “CD/DVD Drive” drop down list. Select “Choose a virtual CD/DVD disk file…” Now broswe to and select the .iso file you downloaded from the Android-x86 web site. Click “OK”.Once you are back in the main VirtualBox window hit the big green “Start” button to boot up Android 4.0.

At the boot menu select “Live CD – VESA mode” and hit Enter. Android 4.0 will start to boot. Once booted you will be greeted by the ICS Welcome screen.

Just like Android-x86 on a netbook, use your mouse to click on “Start” and then complete the first-time configuration. If you don’t see the mouse inside the VM, click the “Machine” menu item on the VM window and then “Disable Mouse Integration.”

There is one major drawback with running ICS in a virtual machine, or in fact in any PC without a WiFi adapter - the release candidate doesn’t support wired networking. This means that you can’t access the web, the Google Play store, you can’t watch YouTube videos and so on.


Conclusion

Android 4.0 for Intel x86 builds on the solid foundation of Android for ARM and although it has limited hardware support (not all the popular netbooks are supported) running it on a supported platform could bring a new lease of life to some aging hardware and it could provide an interesting alternative to the Metro interface that Microsoft are pushing with Windows 8. However the screen rotation issue can be very disconcerting and the lack of Ethernet support makes it nonviable for Virtual Machines.

Downloads:

Thursday, 11 October 2012

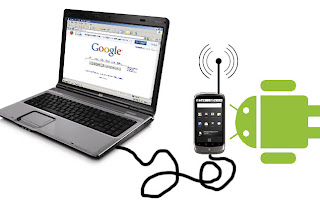
How to:Share PC internet connection with ANDROID mobile via USB(Reverse Tethering)

Hai friends, previously I have posted about how to share your PC internet connection with Android mobile via WIFI. In this post I'm going to explain how to share your PC internet connection with Android mobile via USB.


Share PC internet with android mobile via USB (Reverse thetering)


STEPS:

1.Download the files to corresponding devices.( PC to computer and apk to phone)

2.Extract the pc component.

3.Install the apk file.

4.Ensure the usb Debugging is on.

5.connect the phone via USB

6.open the 'android tool' from the pc component.

7.USB tunnel app will open on its own.

8.now select the device and click connect.

9.Now you can enjoy the superfast broadband on yor mobile.


NOTE:  Tested and working.


HOW TO:SEND FREE SMS DIRECTLY TO ANY MOBILE PHONES IN THE WORLD FROM YOUR GMAIL ACCOUNT

Google has introduced a new feature in Gmail. Now you can send SMS to any mobile in the world through your Gmail by just entering the mobile number. This made Gmail more interesting and the delivery time of the sms is so fast that it will be delivered with in 5 seconds.This is available for all your Gmail accounts.The SMS service can also be accessed from its GTalk application and also from the GTalk integration in Gmail. 

Though there has not been a formal announcement in this regard, Gmail users have been getting a notification indicating the same.

The service has been active for quite some time, but it is only now that Google has made it public.

According to Google, the service is supported by all operators in India and the US, but not by all operators in other countries.

This is available in Afghanistan, Algeria, Angola, Bahrian, Bangladesh, Benin, Egypt, India, USA and many other countries are listed here .

Procedure:

You can send SMS messages to your contacts’ mobile phones using Gmail Chat. To do so from Gmail:
  1. Enter your contact’s name in the ‘Search or invite friends’ box in Chat, and select Send SMS from the box of options that appears to the right of your contact’s name. Or, if you already have a Chat window open for this contact, just click Options, and select Send SMS.
  2. In the dialog box, enter a phone number in the ‘Send SMS messages to this number’ field. This feature is only launched in selected countries. Click here for the list of supported countries and operators. If you are not located in one of these countries you can still use it, but you won't see the SMS option in Chat until you enable it manually in the Chat settings page.
  3. Click Save.
  4. A Chat window appears. Just type your message as you would normally. When you hit Enter, the message will be sent to the phone number you entered.
If your contact replies, the text message response will appear as a reply in Chat. These conversations are stored in your Chat history just like regular chats (but keep in mind that you can’t go off the record while communicating via SMS).


SMS credits

All users get 50 credits every day. Every time the user sends a SMS, one credit is deducted. If the user receives a reply, five credits are credited to the user’s account, but the total number of credits will not exceed 50.

If you run out of credits, you will get a fresh set of 50 credits the next day, but you can always “buy” credits.

Says Google: “Keep in mind that if you'd like a higher message credit, you can always send an SMS to your own phone, and then reply to that message multiple times. Every time you send a reply message, your SMS credit is increased by five. Effectively, you're buying more messages by paying your phone company for these outgoing messages.”

What’s the catch?

If the service is free, is there a catch? Yes, but a minor one. Says Google, “If you are attempting to send an SMS message via chat in Gmail and are told that the recipient must reply before more messages will be delivered, you will not be able to send your message until they do so. At this time, if they are unable to respond, you will be unable to send additional text messages to this contact.

“To prevent abuse, any Gmail user who sends an excessive number of SMS messages from Gmail, without getting any responses in return, will be blocked from sending further SMS messages.”

Monday, 8 October 2012

Internet Download Manager (IDM) Ver-6.7.12.1 Free Download With Patch


Internet Download Manager (IDM) is a tool to increase download speeds by up to 5 times, resume and schedule downloads. Comprehensive error recovery and resume capability will restart broken or interrupted downloads due to lost connections, network problems, computer shutdowns, or unexpected power outages. Simple graphic user interface makes IDM user friendly and easy to use.Internet Download Manager has a smart download logic accelerator that features intelligent dynamic file segmentation and safe multipart downloading technology to accelerate your downloads. Unlike other download managers and accelerators Internet Download Manager segments downloaded files dynamically during download process and reuses available connections without additional connect and login stages to achieve best acceleration performance.

Install notes


Step 1: Install the program
Step 2: Restart your PC if asked
Step 3: Make sure 'Internet Download Manager' is NOT running
Step 4: Run the solution provided and apply patch to the file 'IDMan.exe'
Step 5: Run 'Internet Download Manager'
Step 6: Use the generated serial to register

* This solution is still compatible with v5.12 onwards.

NOTE: Incase you receive message regarding 'cracked-product' in IDM after successful killing of server check this means you have previously registered IDM with fake serial, which then requires you to register with generated serial and restart IDM. Also try to input data in logical format for registration as possible. For example; Email: xxxxx@xxxxx.com

Enjoy!


Sunday, 7 October 2012

Tekken 3 Game Full version free download


My Review on This Game:

Tekken 3 Game is the most playing game, it is a shooting game, and most of the friends go and play tekken 3 game in video game shops, they pay some money for it,get some tokens and play the game, it is a competition game. and you can play it multi players as well as single player,with extreme graphics and small size tekken 3 is the best game.
Tekken 3 is the third installment in the popular Tekken fighting game series. It was released on Arcades in March 1997, and for the PlayStation in mid-1998. A simplified "arcade" version of the game was released in 2005 for the PlayStation 2 as part of Tekken 5's Arcade History mode. The PlayStation version is considered by some as one of the greatest games of its genre.

Gameplay:

Tekken 3 maintains the same core fighting system and concept as its predecessors, but brings many improvements, such as significantly more detailed graphics and animations, fifteen new characters added to the game's roster, more modern music and faster and more fluid gameplay.
Perhaps the most noticeable change from Tekken 2 fight system is movement reform - whereas the element of depth had been largely insignificant in previous Tekken games (aside from some characters having unique sidesteps and dodging maneuvers), Tekken 3 added emphasis on the third axis, where they wouldn't connect in previous games) and extra newly-created combo throws.

The Story:

Set fifteen years after the King of the Iron Fist Tournament 2, the story starts with Jun Kazama, who has been living a quiet life in Yakushima with her young son, Jin, who is the son of Kazuya Mishima.


Character Roster

  1. Returning Characters
  2. Paul Phoenix
  3. Nina Williams
  4. Yoshimitsu
  5. Lei Wulong
  6. Anna Williams 
  7. Heihachi Mishima
  8. New Characters
  9. Jin Kazama
  10. Ling Xiaoyu
  11. Hwoarang
  12. King II
  13. Eddy Gordo
  14. Forest Law
  15. Kuma II
  16. Panda
  17. Julia Chang
  18. Bryan Fury
  19. Gun Jack
  20. Mokujin
  21. Ogre
  22. True Ogre
  23. Tiger Jackson 
  24. Bonus Characters 
  25. Gon


INSTRUCTIONS:

1.Download the software, installatons is not required.
2.extract the folder.
3.double click on "registry.reg" and then press ok.
you are done. ENJOY...!!!


Download Tekken3 Full Game


To play this game on ANDROID mobiles CLICK HERE 

Complicated?
If you have any question about any Post, Don't hesitate to ask question.You can simply drop a comment below post.Your Feedback always appreciated.